Cloud
With Cloud, you can share Sketch documents in the browser and invite others to view, comment and even inspect them for developer handoff — all for free.
With a Teams subscription, you get a shared Cloud workspace for easy access to all your team’s documents. With a license key, you get a personal workspace where you can invite others to your documents by email or with a link.
How to Get Started with Cloud
The documentation below covers everything you need to know to make the most of Cloud and collaborate on your designs. But if you’re new to Cloud and need to get set up, the following guides may be helpful:
- How to create a Sketch Account
- How to manage your Sketch Account settings
- How to start a Teams subscription and create a shared workspace
- How to manage a shared team workspace
- How to manage workspace members
Cloud Basics
You can work with Cloud documents in the browser and in the Mac app. Cloud documents show a Cloud icon ![]() next to their title in the Mac app, so it’s easy to tell them apart from local documents.
next to their title in the Mac app, so it’s easy to tell them apart from local documents.
How to Open Cloud Documents
In the Mac app You can find and open Cloud documents in the Documents window. If you’re part of a Team or have created Projects ![]() , you’ll see these in the sidebar. Clicking on a Team or Project name will show only the Cloud documents that belong to it.
, you’ll see these in the sidebar. Clicking on a Team or Project name will show only the Cloud documents that belong to it.
You can also bring up the Documents window to open a Cloud document by choosing File > Open Cloud Document (or press ⌘ + ⇧ + O).
How to open a document in the Mac app from Cloud
You can open any Cloud document in the Mac app directly from your browser by clicking on the Open in Sketch button at the bottom of the sidebar in a document’s overview. Depending on your browser, you may have to confirm this action before your document will open in the Mac app.
If you are viewing a single Artboard, you’ll see a new icon to the right of the zoom controls to open your document focused on that specific Artboard in the Mac app.
You can also open documents in the Mac app from the All Documents view ![]() in your Cloud workspace. To do this, hover over any document’s thumbnail, click … and choose Open in Sketch.
in your Cloud workspace. To do this, hover over any document’s thumbnail, click … and choose Open in Sketch.
Note: This feature will only work with version 64 or newer of the Mac app.
How to Create Cloud Documents
In the Mac app To create a new document, you can either double-click on the New Document thumbnail in the Documents window, choose File > New, or press ⌘ + N.
How to Save Cloud Documents
In the Mac app Choose File > Save (or press ⌘ + S) and select the Sketch Cloud option to save your document to Cloud. You can pick a Project ![]() to save to (if you’ve created one) and choose a workspace to save to (if you’re part of any Teams).
to save to (if you’ve created one) and choose a workspace to save to (if you’re part of any Teams).
If you close a document while it’s saving to Cloud, we’ll ask you whether you want to wait for the save to complete or whether you want to close and cancel the save.
You can also save a document to Cloud by clicking on the Cloud button in the toolbar ![]() , choosing a Workspace (if you’re part of a Team) and Project
, choosing a Workspace (if you’re part of a Team) and Project ![]() (if you’ve created one) to save to then clicking Upload.
(if you’ve created one) to save to then clicking Upload.
If you have a document saved locally (on your computer) you can drag-and-drop it onto the Documents window to save it to Cloud. When you do this, you’ll be able to choose a workspace and Project ![]() to save it to. This also works with multiple documents, making it great if you’re moving an entire set of documents to Cloud for the first time.
to save it to. This also works with multiple documents, making it great if you’re moving an entire set of documents to Cloud for the first time.
How to Rename Cloud Documents
In the Mac app Choose File > Rename…, enter its new name in the title bar, then press enter on your keyboard to save.
You can also double-click on any document thumbnail in the Documents window (or Control-click on the thumbnail and choose Rename) to rename it.
In the browser From your workspace or project view, hover over your document’s thumbnail, choose … then Rename Document…. From the document or Artboard view, click on the settings icon ![]() in the top-right and choose Rename Document….
in the top-right and choose Rename Document….
How to make a local copy of a Cloud Document
In the Mac app Depending on your Auto Save preferences, you can either choose File > Duplicate (Auto Save enabled) or File > Save As… (Auto Save disabled) to save a new copy of your current document. In the save sheet, you can choose to save it locally (on your Mac) or to Cloud.
Tip: If you have Auto Save enabled, you’ll only see Duplicate in the File menu, but you can hold down ⌥ to show Save As… instead.
In the browser From your workspace or project view, hover over your document’s thumbnail, choose … then Download Document. From the document or Artboard view, click on the settings icon ![]() in the top-right and choose Download Document.
in the top-right and choose Download Document.
How to delete Cloud Documents
In the Mac app Control-click on a document’s thumbnail in the Documents window and choose Delete Document…, or click once on the thumbnail to select it and press the backspace key on your keyboard.
In the browser From your workspace or project view, hover over your document’s thumbnail, click the … icon and choose Delete Document…. You can also drag and drop a document’s thumbnail to the Trash item in the sidebar ![]() .
.
If you’re viewing a single Artboard or in the document’s overview, you can click on the settings icon gear.small in the top-right and choose Delete Document….
When you delete a document in your Cloud Workspace you’ll send it to the Trash ![]() . We’ll automatically delete any documents that have been in the Trash for 90 days, but up until that point you can easily restore them.
. We’ll automatically delete any documents that have been in the Trash for 90 days, but up until that point you can easily restore them.
How to restore documents
To restore a file in the Trash ![]() , click on the document’s preview and choose Restore. You can also hover over the document’s preview in the Trash, click
, click on the document’s preview and choose Restore. You can also hover over the document’s preview in the Trash, click ![]() and select Restore document.
and select Restore document.
How to permanently delete documents
If you want to permanently delete a document, hover over its thumbnail in the Trash, click ![]() and select Delete Permanently. When you delete a document permanently, it will also remove all its activity and history for your whole team.
and select Delete Permanently. When you delete a document permanently, it will also remove all its activity and history for your whole team.
To empty the Trash, hover over the Trash icon ![]() in the sidebar, click
in the sidebar, click ![]() and select Empty Trash. Be careful — anyone in your team can empty the Trash and this is a permanent action, so please be sure before you do so!
and select Empty Trash. Be careful — anyone in your team can empty the Trash and this is a permanent action, so please be sure before you do so!
Note: At this time, you can only access and empty the Trash ![]() from your web browser. We’ll be bringing this functionality to the Mac app in a future update.
from your web browser. We’ll be bringing this functionality to the Mac app in a future update.
How to move documents from a personal to a Team workspace
In the browser You can move documents from your personal workspace to your Team’s workspace by hovering over the document’s thumbnail, clicking the “more options” icon ![]() that appears and choosing Move to Team. From there, select the team you want to move your document to and click Save Changes to confirm.
that appears and choosing Move to Team. From there, select the team you want to move your document to and click Save Changes to confirm.
Note: You cannot undo the process of moving a document from a personal to Team workspace.
How to delete versions
In the browser Open your document and hover over the version you want to delete in the sidebar, click on ![]() and choose Delete Version. You will need to confirm that you want to delete that version by clicking Delete version in the confirmation window that appears.
and choose Delete Version. You will need to confirm that you want to delete that version by clicking Delete version in the confirmation window that appears.
If there is only one version in the document’s history, you won’t be able to delete it.
Sharing Cloud Documents
In the Mac app From the Documents window, you can Control-click on any Cloud document and choose Copy Link to copy a link to the document in Cloud to your clipboard.
In an open document, click on the Cloud button ![]() in the toolbar and choose Copy Link to copy a link to the document in Cloud to your clipboard.
in the toolbar and choose Copy Link to copy a link to the document in Cloud to your clipboard.
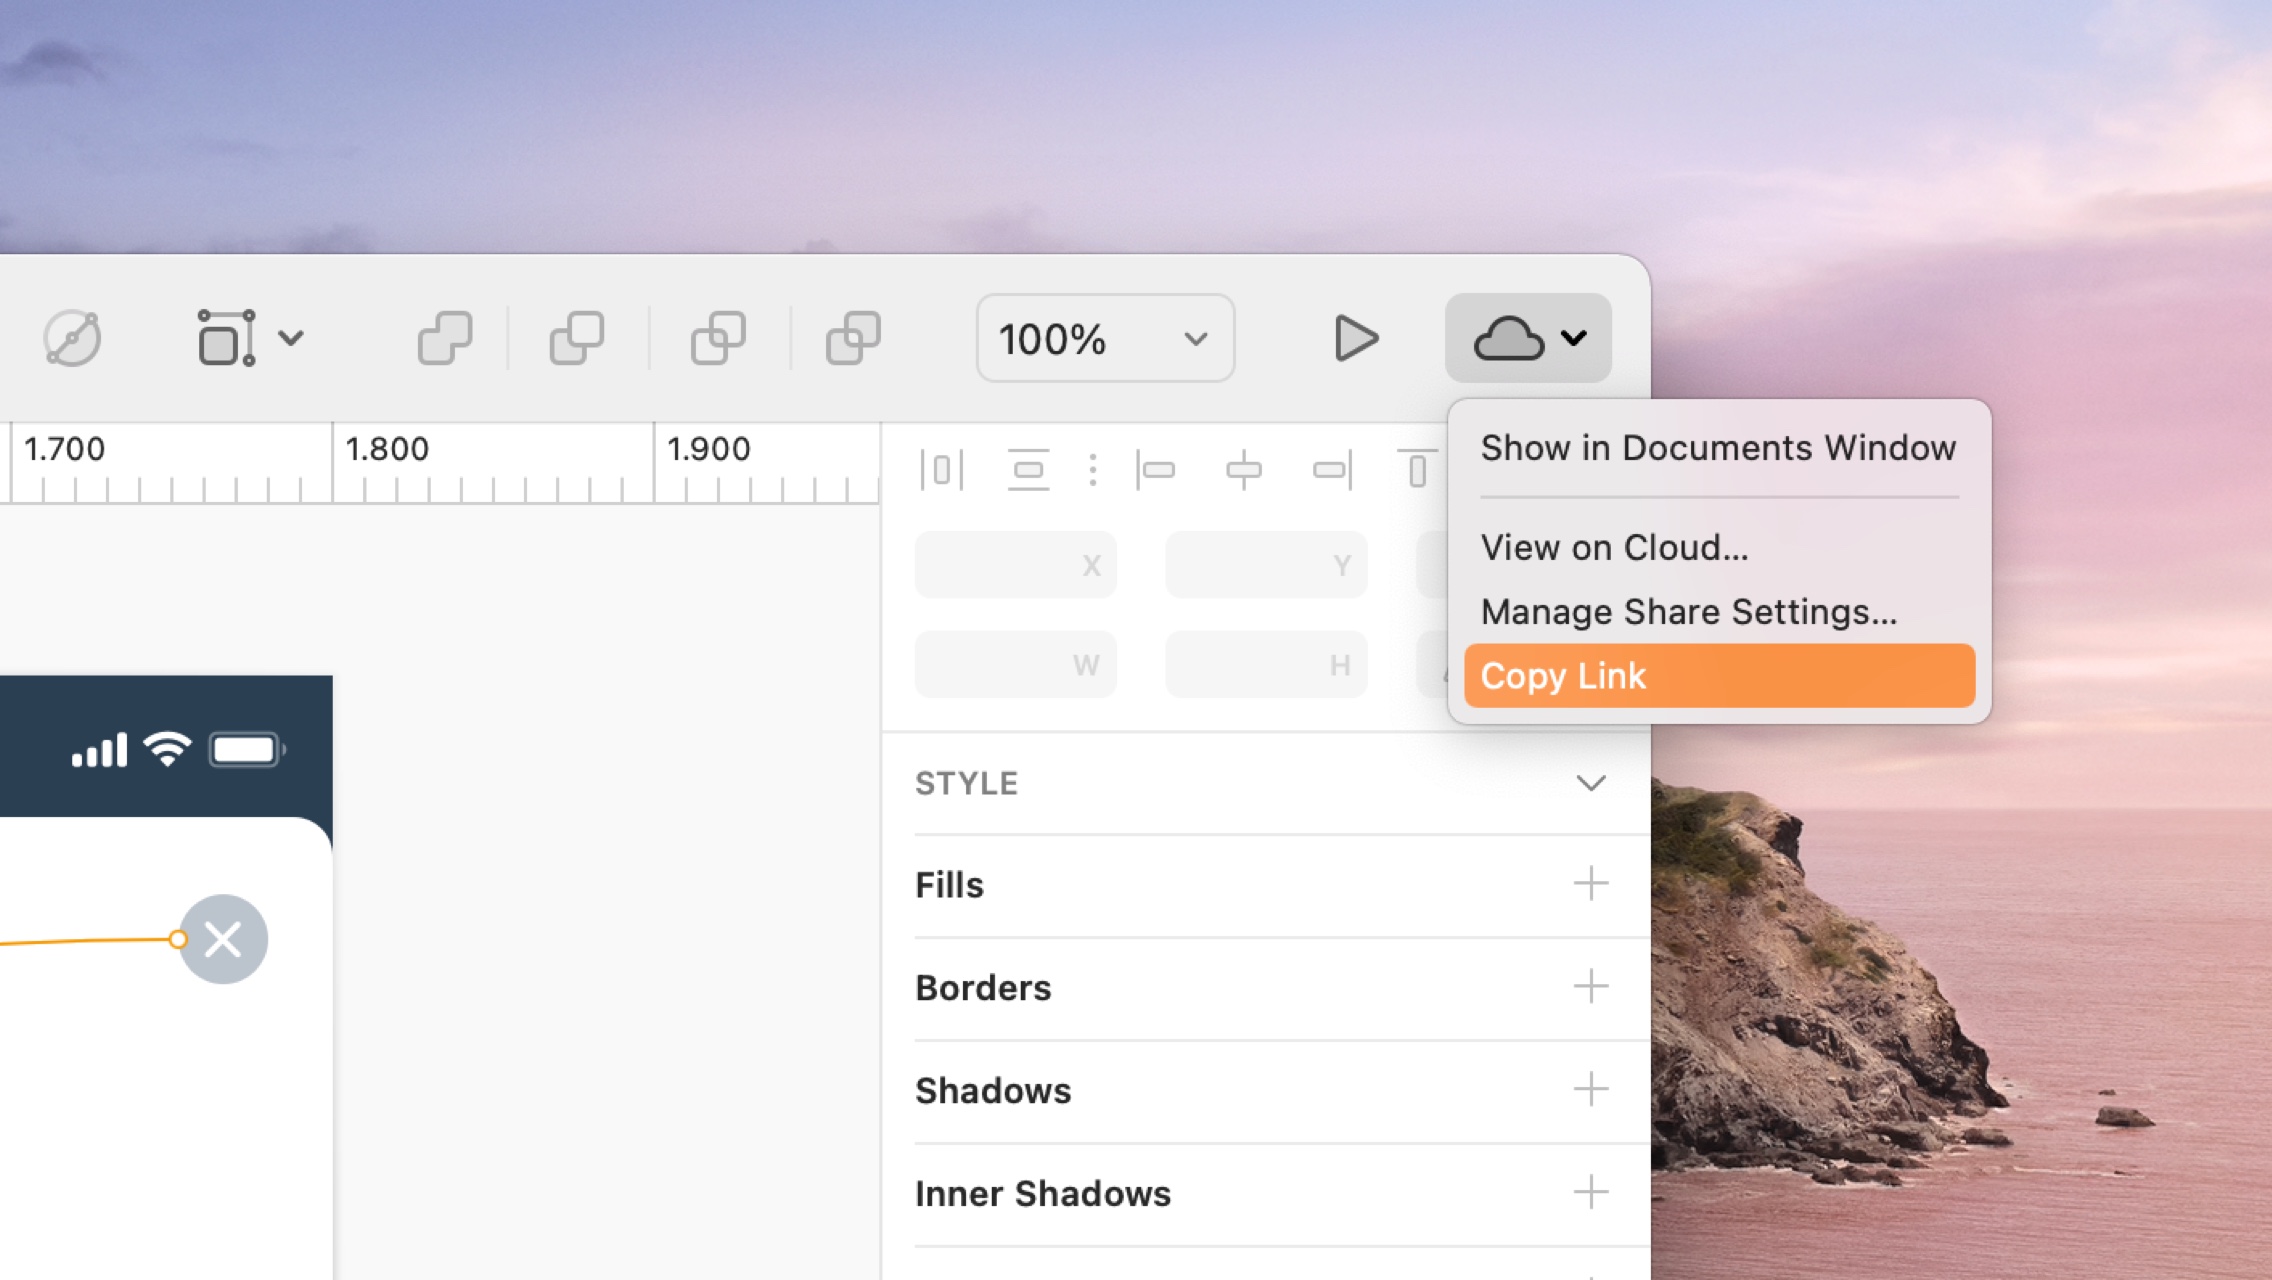
You can also choose Manage Share Settings… to open the document’s share settings in Cloud in your web browser. From here, you can select who can see your document and if they’re able to comment on it, download it or use it as a Library ![]() .
.
Tip: You can find both Copy Link and Manage Share Settings… in the menu bar under File > Cloud as well.
If you’re viewing a document in Cloud in your web browser, click on the “more options” icon ![]() icon in the top-right to open its Share Settings and invite people to view your document via email. Or simply copy the link in your browser’s address bar if you’ve set the document to be visible to anyone with the link.
icon in the top-right to open its Share Settings and invite people to view your document via email. Or simply copy the link in your browser’s address bar if you’ve set the document to be visible to anyone with the link.
Note: If you’re viewing an older version of a document in Cloud, you can copy and paste its URL to link specifically to that version. The URL for the document overview will always link to the most recent version.
Viewing Cloud Documents in the Browser
There are a few different ways to view Cloud documents in your web browser.
In the Mac app With a Cloud document open, click on the Cloud button in the Menu Bar, or head to File > Share, and choose View on Sketch Cloud…. This will open the document in a new browser window.
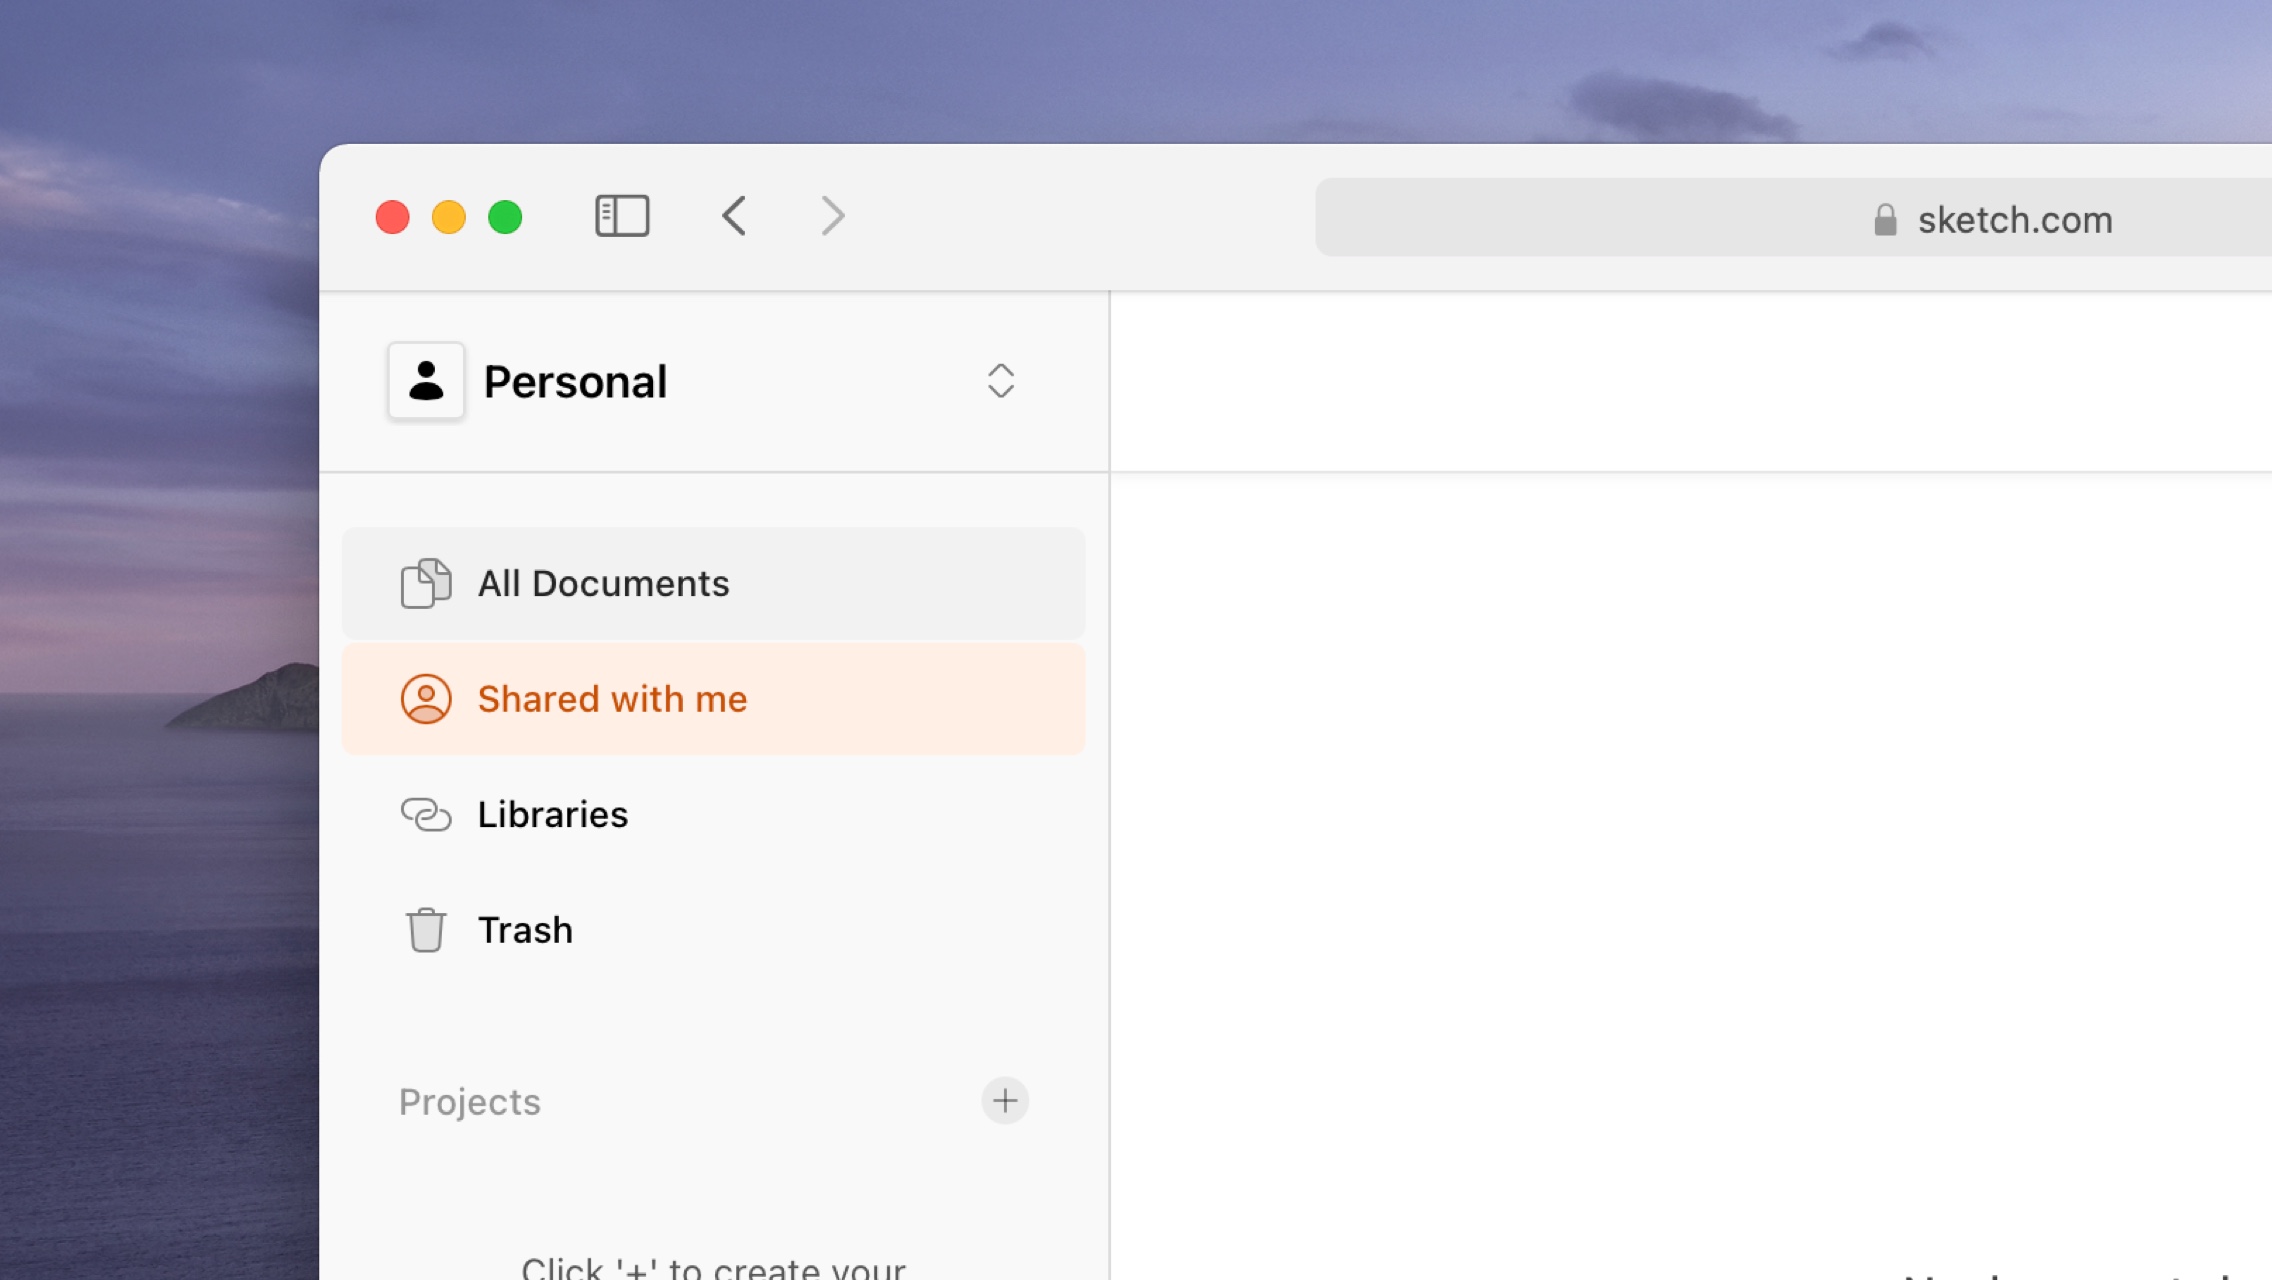
In the browser If someone has shared a document with your Cloud email address, you’ll find it under the Shared with Me tab in your Personal Workspace.
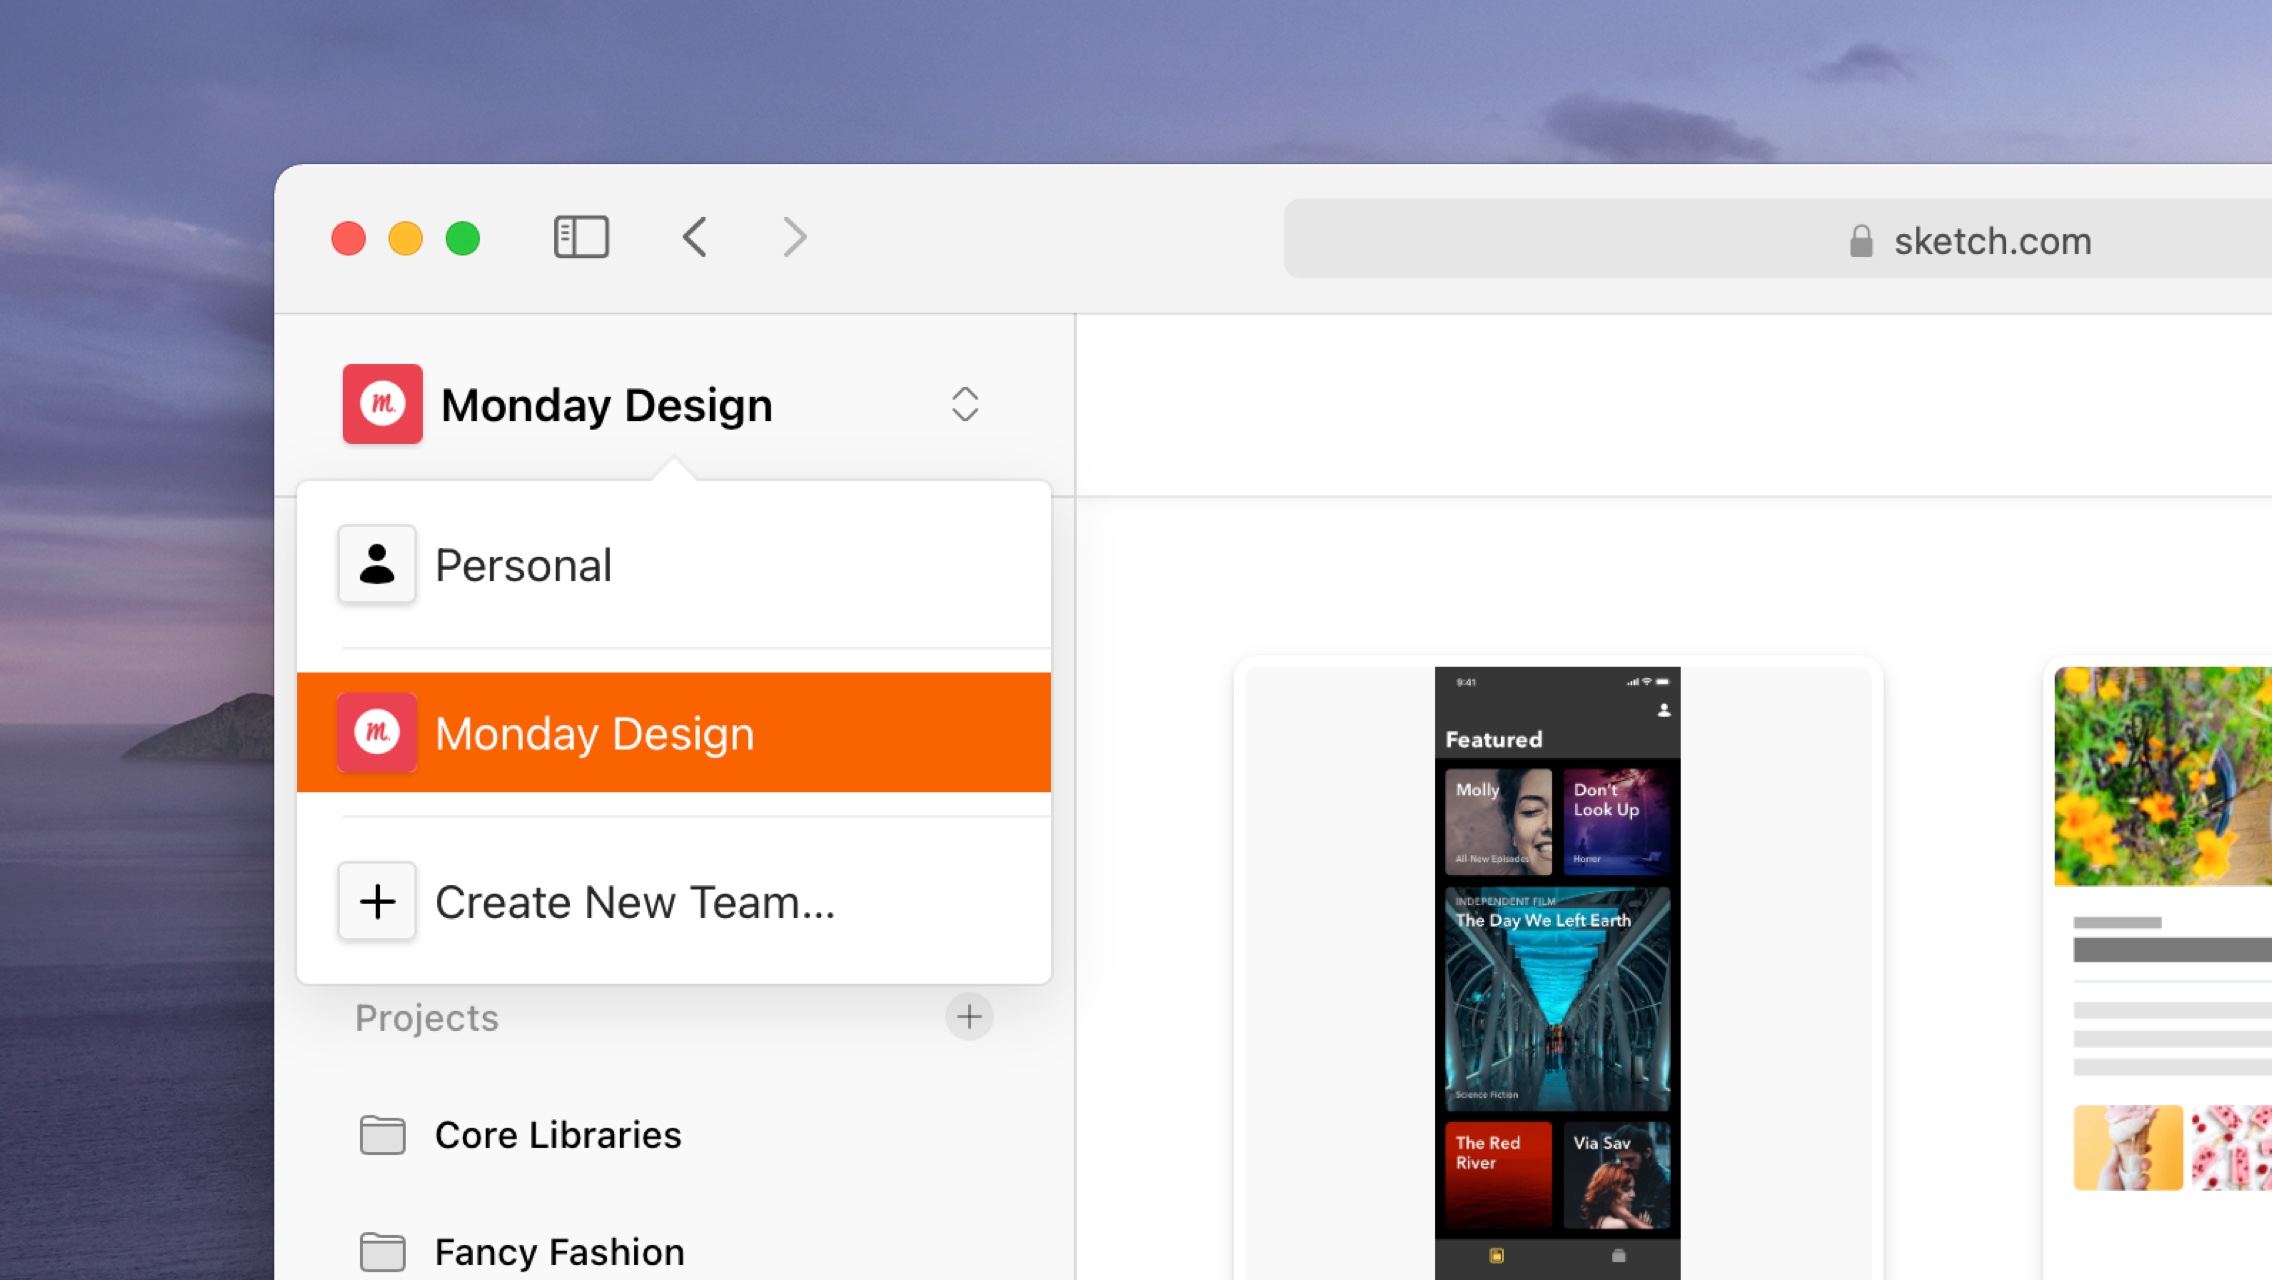
If you’re part of a Team (as a Contributor or Viewer), select your Team from the drop-down menu in the top-left of Cloud to view all of the documents your Team have shared.
If you’ve been sent a link to a Cloud document, clicking on that link will open it up in Cloud in a new browser window.
When you open a document in Cloud, you’ll see its prototypes, pages, Artboards ![]() and Symbols
and Symbols ![]() . You can click any of these to view them in more detail. You can also use the drop-down menu in the document’s title to view a particular page’s Artboards.
. You can click any of these to view them in more detail. You can also use the drop-down menu in the document’s title to view a particular page’s Artboards.
When you’re viewing an individual Artboard, you can use the Arrow keys or click on the arrows in the top-right to jump between the different Artboard ![]() in the document.
in the document.
When you’re viewing an individual Artboard ![]() , you can click on it to zoom in and view it full size — or use the zoom controls in the top-right. You can also press 0 to zoom to 100%, 1 to fit the Artboard on your screen, + to zoom in (or = on non-US keyboars) and - to zoom out.
, you can click on it to zoom in and view it full size — or use the zoom controls in the top-right. You can also press 0 to zoom to 100%, 1 to fit the Artboard on your screen, + to zoom in (or = on non-US keyboars) and - to zoom out.
From there, you can scroll around to see all of its contents.
How to Comment on Cloud Documents
You can add comments against any Artboard in a Cloud document in your web browser. To get started, make sure you’re viewing an individual Artboard, that the sidebar is showing on the right (click on the sidebar icon in the top-right to show or hide it it) and that you’ve selected the Activity tab.
From here, you can browse and add comments, or reply to any comment in a Thread. If you want to edit or delete a comment, hover over it, click on ![]() and pick the action you need. You can use emoji, Markdown and mentions in your comments and replies.
and pick the action you need. You can use emoji, Markdown and mentions in your comments and replies.
Note: By default, we enable comments for all documents. To disable comments for a specific document, head to its overview, click on the cog icon ![]() in the top-right and choose Document Settings…. From there, uncheck the Comment option and choose Save.
in the top-right and choose Document Settings…. From there, uncheck the Comment option and choose Save.
How to Use Comment Threads
You can use threads to reply to any comment outside of the main feed. Threads make it easy to organize discussions and keep track of different conversations.
To get started, find the comment you want to reply and start a thread against and click the Reply link underneath it. Type your comment, then press ⌘Enter to post it.
Comments that already have a thread will show the number of replies underneath them instead of a Reply link. To open up that thread, click on the X Comments link.
How to Manage Comment Notifications
You can choose to get notifications for new comments on a specific thread, a single Artboard (or a selection of them) or for the whole document. By default, we’ll enable notifications for any Cloud document you comment on, but you can change this at any time.
To receive notifications for a whole document, go to the document’s overview page and select Follow this Document in the dropdown menu in the sidebar. Choose Stop Following this Document to stop receiving notifications.
If you want to receive notifications for a specific Artboard, open that Artboard and choose Follow this Artboard from the dropdown menu in the sidebar.
Controlling notifications for specific threads works in exactly the same way. Click on the X Replies link below a comment to see the Thread, then click on the Follow this Thread option in the dropdown menu.
How to view Comment Notifications
You can access all your notifications by clicking on the bell icon in the top-right corner of the window. You’ll get a preview of the replies and mentions you’ve subscribed to. To finish reading or reply to any comment, click on its notification.
Click on the tick to the right of the notification to mark it as read — or choose Mark all as read.
How to View Cloud Document Prototypes
When you open a document in Cloud, you’ll see any Prototypes it contains in a section at the top of the document overview. Click on a Prototype’s thumbnail to open and preview it in your browser.
Like the Preview window in the Mac app, clicking anywhere on the screen will highlight any Hotspots ![]() or Links. To go back a step to the previous Artboard
or Links. To go back a step to the previous Artboard ![]() , click the back button in your browser.
, click the back button in your browser.
If you’ve enabled comments on your document, anyone viewing your Prototype can choose View Artboard at the bottom of the window to leave the Prototype and enter a static view of that Artboard . From there, they can leave comments in the sidebar. To close the Prototype and return to the document overview, choose Close.
How to View Prototypes without Hotspots
In the browser To share a Prototype preview without hotspots enabled, hover over the Prototype thumbnail in the documents overview, click on the … button and choose Copy link to Prototype with Hotspots disabled.
How to Download Documents from Cloud
In the browser If a document in Cloud has downloads enabled, you can download it by clicking Download Document at the bottom of the sidebar in the document view.
Note: Clicking Download Document will always download the version of the document you’re currently viewing, even if that’s an older version.
To enable or disable downloads for a specific document, open it up in Cloud, click on the “more options” icon ![]() in the top-right and choose Settings. From there, check or uncheck the Download option.
in the top-right and choose Settings. From there, check or uncheck the Download option.
How to Use Versioning with Cloud documents
When you make updates to a document you’ve saved in Cloud, it’ll automatically appear as a new version within the sidebar on Cloud.
You can also see versions for specific Artboards ![]() (if they’ve changed) in the Artboard view.
(if they’ve changed) in the Artboard view.
You can click on any version in the sidebar to view an older version. When you’re viewing an older version, you can click the See Latest Version button in the top-right to go straight to the latest version.
Projects
You can use Projects ![]() to organize your Cloud documents by client, status or any other grouping that suits you or your team.
to organize your Cloud documents by client, status or any other grouping that suits you or your team.
In the browser Projects ![]() appear in the sidebar. To only show documents that are part of a specific project, click the project’s name in the sidebar.
appear in the sidebar. To only show documents that are part of a specific project, click the project’s name in the sidebar.
Under the All Documents ![]() tab, you’ll see every document in your team or personal workspace by default. To hide the documents that are already part of a project
tab, you’ll see every document in your team or personal workspace by default. To hide the documents that are already part of a project ![]() , you can deselect on the Include Documents in Projects checkbox in the top-right corner.
, you can deselect on the Include Documents in Projects checkbox in the top-right corner.
In the Mac app Projects appear in the sidebar of the Documents window, organized by the workspace they belong to.
How to create a project
In the browser Click on the + next to the Projects ![]() heading in the sidebar. In the dialog that appears, give your project a name (Emoji are supported, but not Markdown) and click Create Project to finish. You should now see your project in the sidebar ready to move documents into.
heading in the sidebar. In the dialog that appears, give your project a name (Emoji are supported, but not Markdown) and click Create Project to finish. You should now see your project in the sidebar ready to move documents into.
In the Mac app Click on the + icon next to the workspace name in the sidebar of the Documents window to add a project to that workspace. Type a name for your project and press enter on your keyboard to confirm it.
How to move documents to projects
In the browser Drag the document you want to move and drop it onto its project folder in the sidebar. You can also, hover over a document’s thumbnail and click on the ![]() icon to bring up its options. From there, choose Move to Project. In the window that appears, select the project
icon to bring up its options. From there, choose Move to Project. In the window that appears, select the project ![]() you want to move the document to from the drop-down menu then click Move.
you want to move the document to from the drop-down menu then click Move.
How to remove documents from Projects
In the browser Hover over a document’s thumbnail and click on the ![]() icon to bring up its options. From there, choose Remove from Project. In the window that appears, click Remove to confirm. If you remove a document from a project, you’ll be able to find it in All Documents
icon to bring up its options. From there, choose Remove from Project. In the window that appears, click Remove to confirm. If you remove a document from a project, you’ll be able to find it in All Documents ![]() .
.
How to rename projects
In the browser Hover over a project ![]() name in the sidebar, then click on the
name in the sidebar, then click on the ![]() icon that appears next to it. From here, choose Rename. In the dialog that appears, give your project a new name, then click Save Changes to confirm. This won’t affect any documents inside this project.
icon that appears next to it. From here, choose Rename. In the dialog that appears, give your project a new name, then click Save Changes to confirm. This won’t affect any documents inside this project.
In the Mac app Control-click on a project’s name in the sidebar of the Documents window and choose Rename Project, type a new name and press enter on your keyboard to confirm.
How to delete projects
In the browser Hover over a project ![]() name in the sidebar, then click on the
name in the sidebar, then click on the … icon that appears next to it. From here, choose Delete. In the dialog that appears, click Delete to confirm that you understand that you cannot undo this action. Any documents in the project you’re deleting will move to All Documents ![]() .
.
In the Mac app Control-click on a project’s name in the sidebar of the Documents window and choose Delete Project…. In the confirmation dialog that appears, choose Delete Project to confirm this action.
Cloud Inspector (Beta)
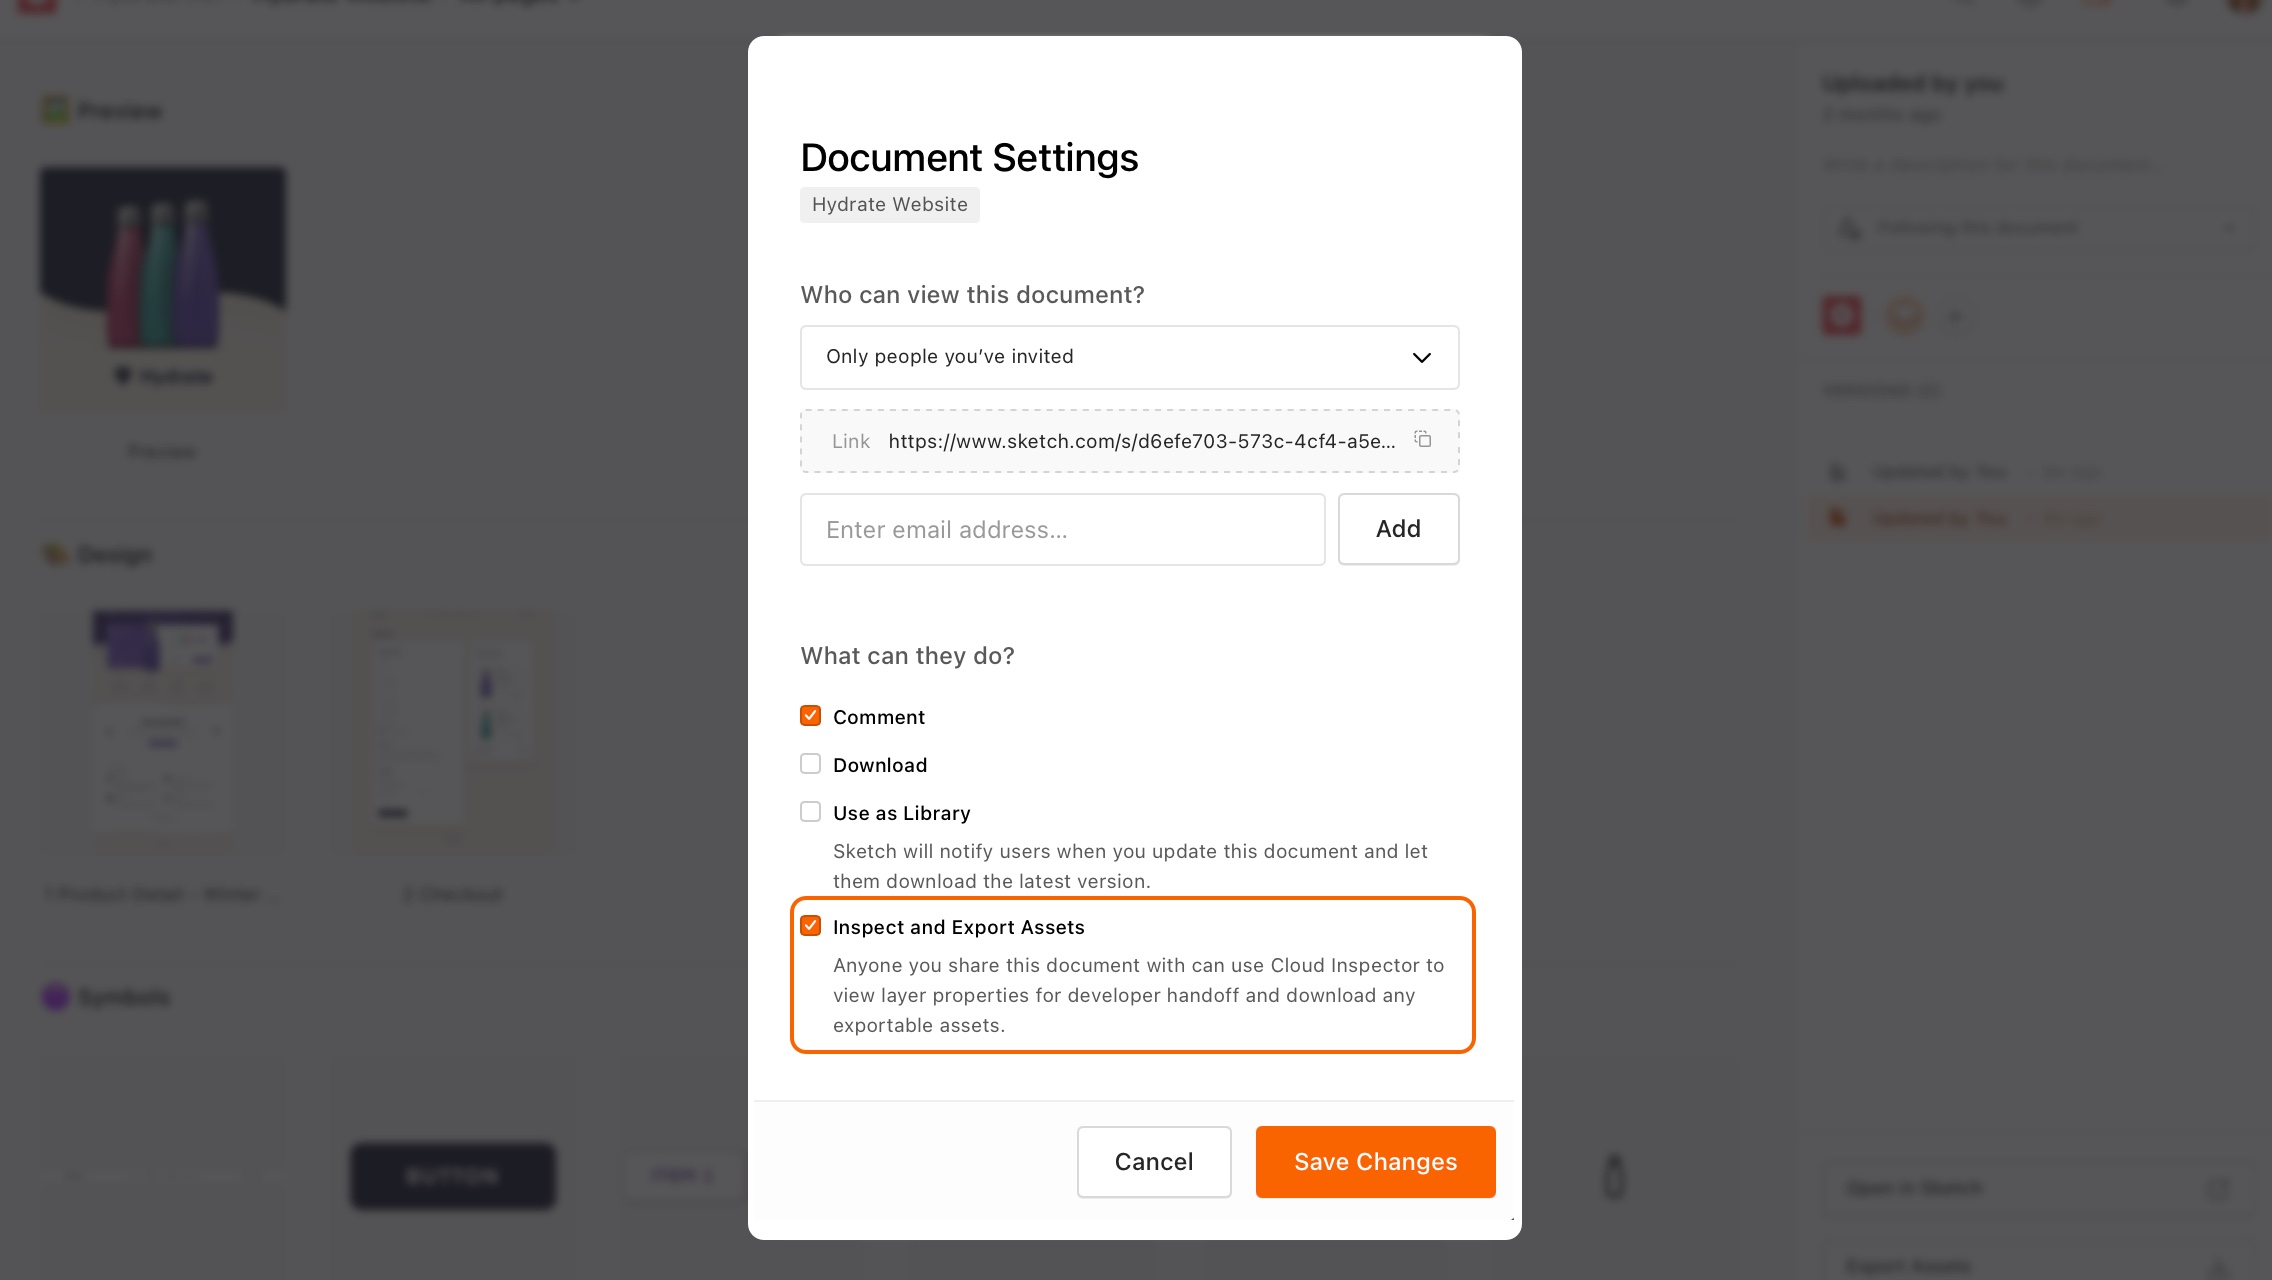
With Cloud Inspector, you can select and measure between layers on Artboards, view layer attributes, and copy values ![]() to your clipboard. Cloud Inspector is available for all members (Contributors and Viewers) in a shared team workspace by default. For documents you upload to a personal workspace, you can enable Cloud Inspector for anyone you share them with from the document settings menu.
to your clipboard. Cloud Inspector is available for all members (Contributors and Viewers) in a shared team workspace by default. For documents you upload to a personal workspace, you can enable Cloud Inspector for anyone you share them with from the document settings menu.
To use Cloud Inspector, make sure you are viewing an individual Artboard, then click on the Inspect tab in the sidebar. You’ll then see attributes for that Artboard, including its dimensions, a background color (if applied) and any layout settings. This is the default view when you have not selected a layer.
How to inspect layers
Select the Inspect tab in the sidebar, then click on any layer. Where layers overlap, you can Control-click over the layer you want to select and choose it from the contextual menu that appears. When you select a layer, the Inspector will update to display its attributes.
Control-clicking on your artboard brings up the layer selection menu to choose between overlapping layers.
The attributes that you see in the sidebar will depend on the type of layer you’ve selected and the values for that attribute. For example, default values such as 100% opacity or a Normal blend mode are hidden to keep things simple.
How to measure between layers
Select a layer on your Artboard and then hover over another to display measurements that show the relative distances between them.
How to copy layer attributes
To copy an individual attribute in Cloud Inspector, hover over it and click on the copy icon ![]() that appears next to it. You’ll see a notification to confirm you’ve copied it to your clipboard.
that appears next to it. You’ll see a notification to confirm you’ve copied it to your clipboard.
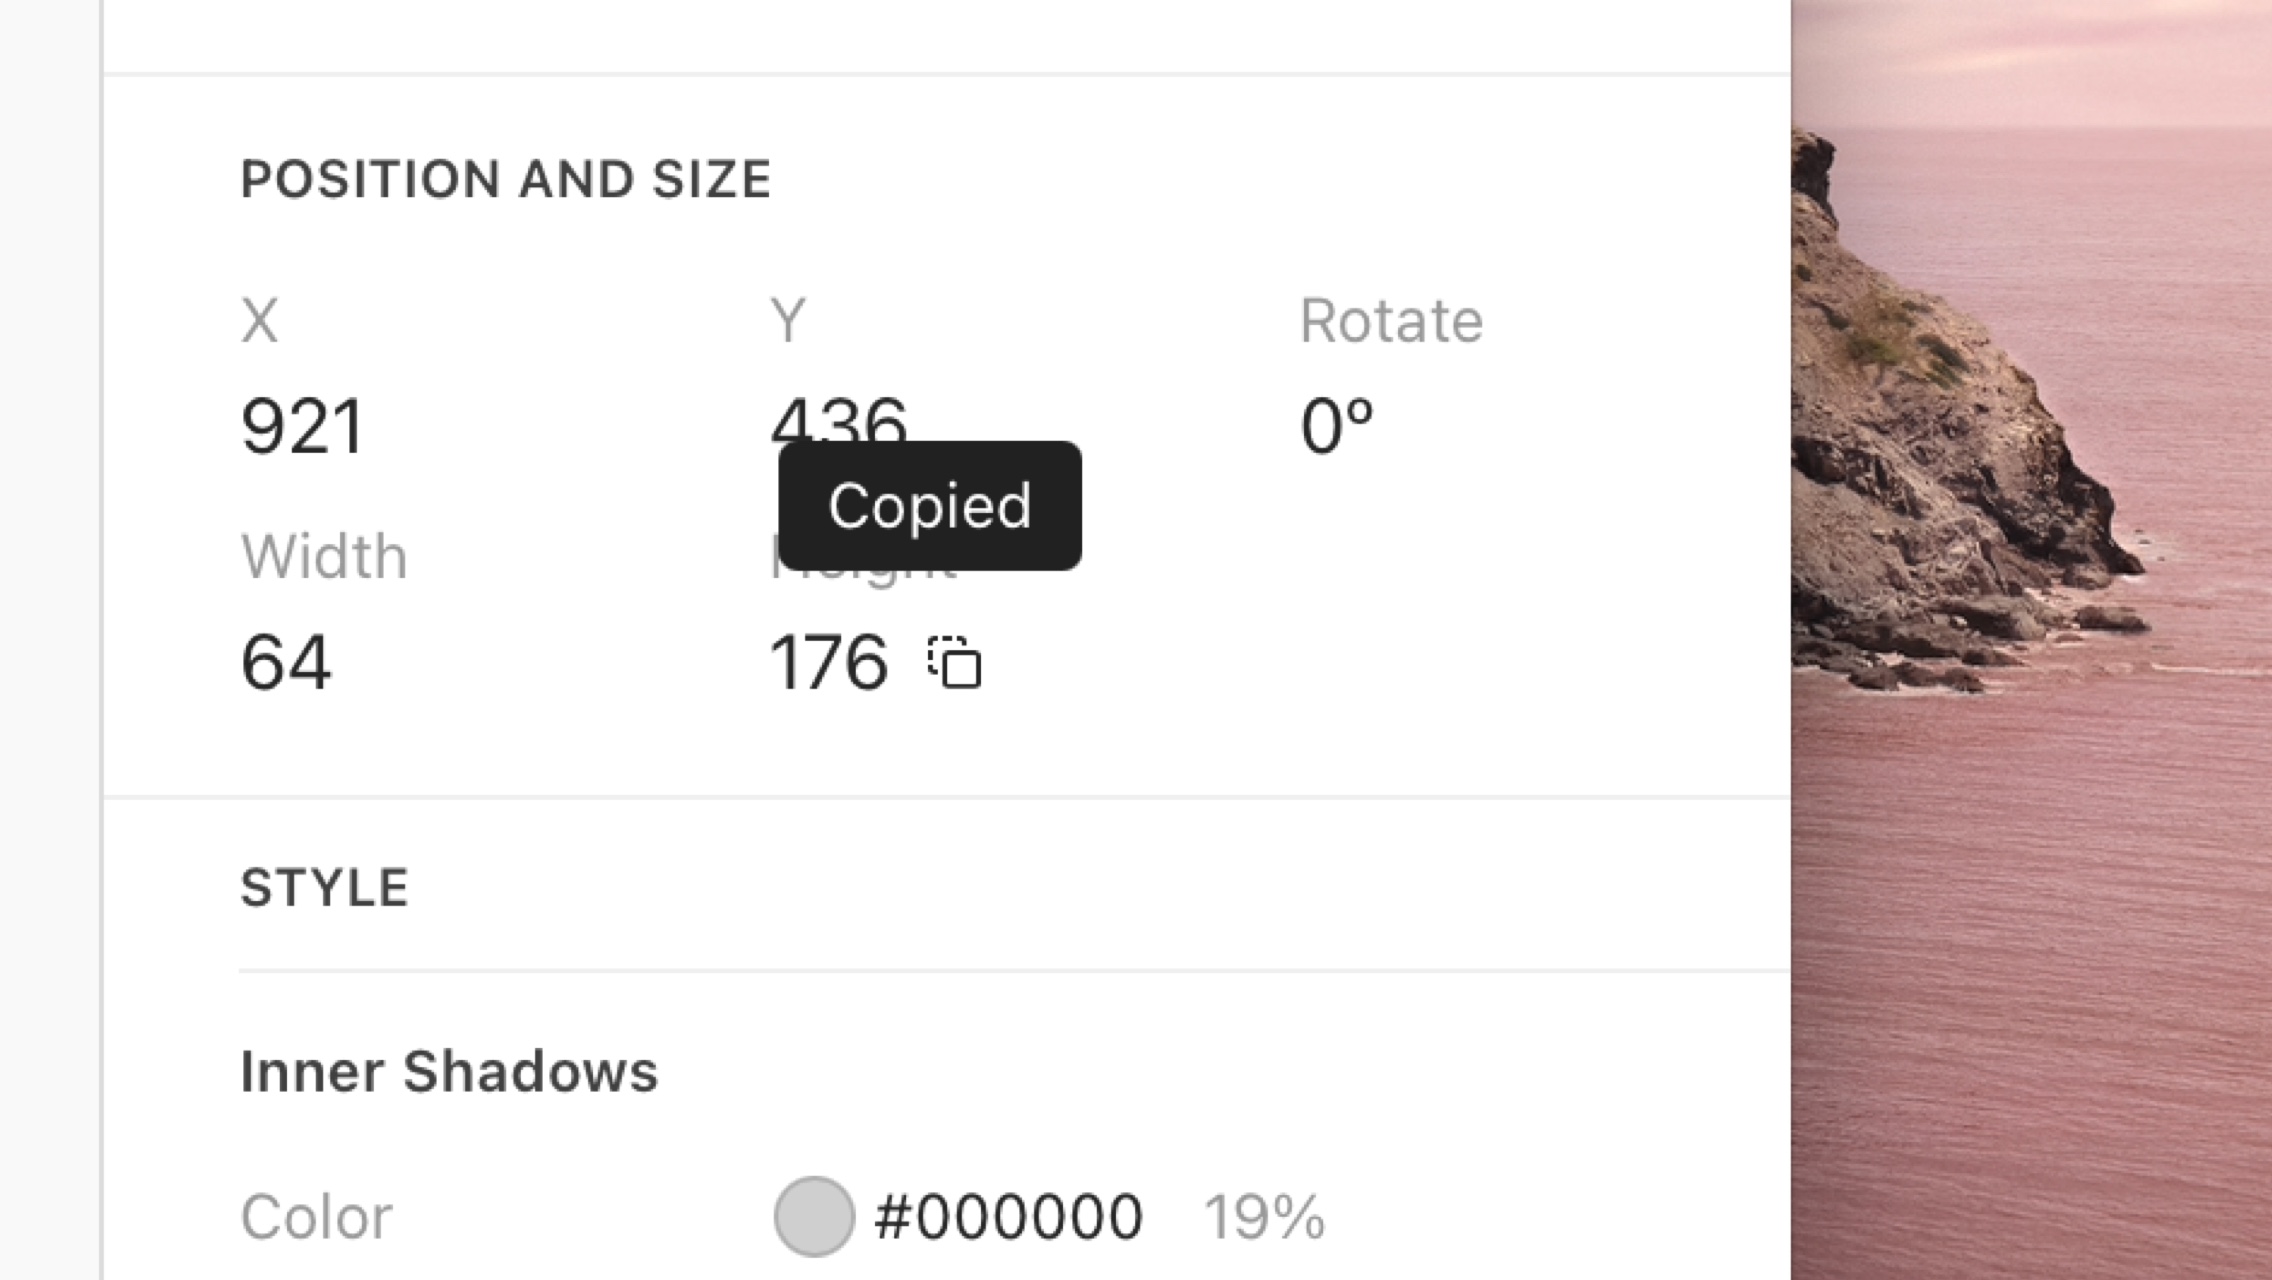
Copying individual attributes only copies the value itself (not the attribute name) to the clipboard, for example:
#000000
Attributes with multiple values (such as a gradient, which has different colors, opacities, an angle and gradient type), will include both the value and the attribute name to the clipboard, for example:
Type: Linear
Angle: 180˚

Color Stop 0
Color: #8763FF
Position: 0%

Color Stop 1
Color: #6236FF
Position: 100%
How to copy multiple attribute values
To copy multiple attribute values at the same time (such as all the values that make up a text layer or all the values of a shadow), hover over the heading above the group of values (e.g. Shadows, Borders, Text) and click the copy icon ![]() that appears. This will copy all of the values related to that specific attribute for the layer you’ve selected.
that appears. This will copy all of the values related to that specific attribute for the layer you’ve selected.
How to copy colors and Color Variables
To copy a color value to your clipboard, hover over it and click the copy icon ![]() that appears next to it. To change the format (to Obj-C or Swift, for example), click on the arrow next to the copy icon and pick the format you need from the list.
that appears next to it. To change the format (to Obj-C or Swift, for example), click on the arrow next to the copy icon and pick the format you need from the list.
To view and copy values for Color Variables or gradients, you’ll need to click on their name first. You can also copy a Color Variable or gradient’s name and value together, by clicking on the copy icon ![]() next to the name.
next to the name.
In this example, we are choosing a format to export our Color Variable and copying its name and values.
The formats you can choose from are:
- HEX
- RGB
- HSL
- NSColor (Objective-C and Swift)
- UIColor (Objective-C and Swift)
When you select a color format, Cloud Inspector will save your preference and copying a different color attribute will use the same format as your original selection.
Note: At this time, Tints are not available in Cloud Inspector.
Exporting Assets
As well as being able to inspect documents on Cloud, anyone with access to a document can now download assets that are set as exportable. Asset exports happen on request and only for the person that requests them.
How to export individual assets
Head to any Artboard within your document on Cloud and select the Inspector tab in the right sidebar. From there, click on any layer on the Artboard to bring up its Inspector attributes.
If that layer has had export options set for it in the original Sketch document, you’ll see those export options at the bottom of the sidebar.
Click on the download button next to any of the export options to download the layer in that format. If you select a format that has multiple sizes or resolutions, your download will include every size or resolution for that format.
In this example, the PNG export is available at 1x and 2x resolution, so these appear together and download in a ZIP file.
To download the asset you’ve selected in all formats, sizes and resolutions, click the download button next to All Formats.
Note: If you select a layer and expect to see export options but Cloud Inspector does not show you any, it might be that the exportable layer is hidden behind another layer or within a group. Try Control+clicking on the layer to view the selection menu and look for a layer with the Slice ![]() icon. This indicates a layer has export options.
icon. This indicates a layer has export options.
How to export all assets
To export all of the assets in a Cloud document, navigate to its overview page and click on the Export Assets button at the bottom of the right sidebar. You’ll get the option to download the final files in ZIP format.
There may be a short wait for the assets to process before you can download them, depending on their size.
Depending on the total size of the assets you’re exporting, you may be able to download your assets straight away, or you may see a notification that explains the export is processing and that we’ll notify you once it’s complete.
If you have to wait for an export to process, don’t worry, you can navigate away from your document on Cloud and we’ll send you an email to let you know when it has finished.
How to make sure you can export assets from Cloud
In order to export and download assets from Cloud, you’ll need to have done the following in the Mac app first:
If none of the layers, Artboards ![]() or groups in your Sketch document are exportable, or it doesn’t contain any slices
or groups in your Sketch document are exportable, or it doesn’t contain any slices ![]() , you won’t be able to use the Export Assets feature for that document in Cloud. If the Export Assets button in Cloud
, you won’t be able to use the Export Assets feature for that document in Cloud. If the Export Assets button in Cloud ![]() is greyed out or individual assets don’t show any export options, it’s because there aren’t any layers or Artboards set as exportable for it.
is greyed out or individual assets don’t show any export options, it’s because there aren’t any layers or Artboards set as exportable for it.